https://fireball.amsmeteors.org/members/imo_view/event/2026/850
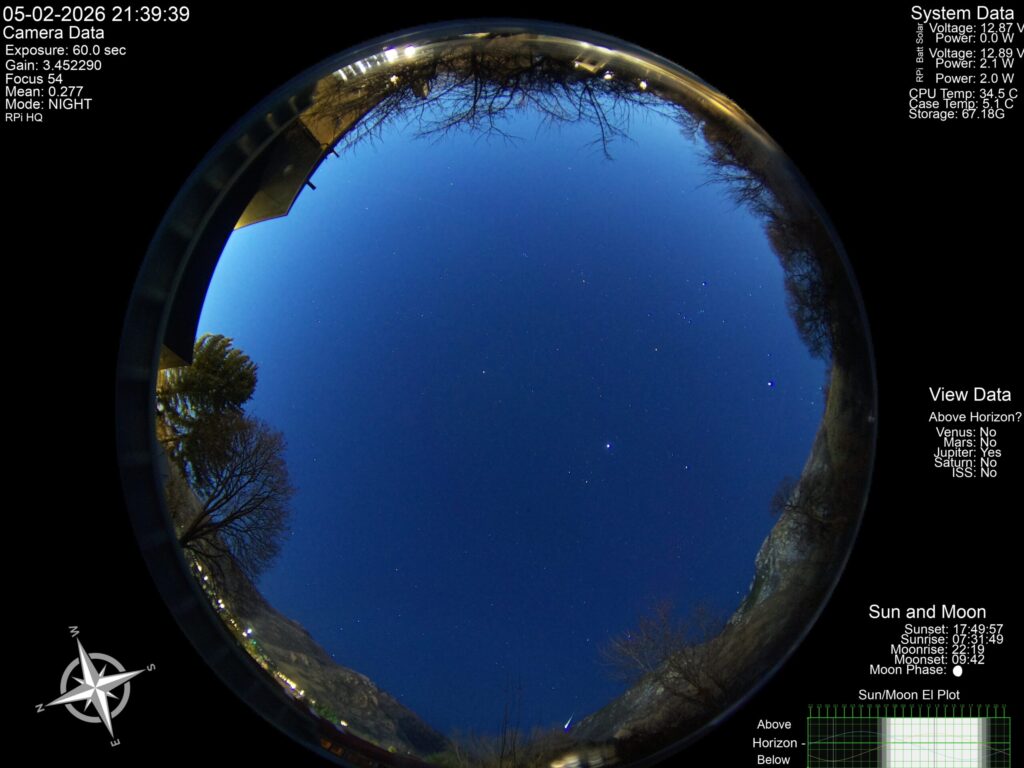
It’s been a while since I last updated the site but I’ve got the camera online and linked up now. Take a look at the Geeky Allsky Camera. I’ve currently got it running continuously, so every 90 seconds during the day and every 60 seconds during the night it refreshes the photo.
I’ve got it running on a solar power system with battery power over night but I slightly undersized the system (more on that soon). So while it runs fantastic in the daylight hours, it tends to die around 4 am local time and stay down until enough sun is hitting the solar panels to bring it back up. Not to worry, I’ve already got a new (bigger) battery on order and hardware to connect it all up. Should be running continuously in the next couple of weeks.
Now sit back and enjoy the view!
Ok, as described in the concept post, this box is going to have a series of software packages installed to enable it to do cool stuff all damn day. I’m a fan of open source and so all of these are coming from GitHub. If you’re not already familiar with GitHub, you’re missing out on some awesome projects.
Hook up hardware, yes all of it.
Flash drive with latest OS-lite using whatever tool you prefer. If this is your first time with a Raspberry Pi I recommend following their instructions to make it easier.
If you’re directly connected to your Raspberry Pi you can setup the rest of the system once it boots. If you’re doing this via SSH, I probably don’t need to tell you but make sure to setup your wifi settings and users in the configuration prior to writing to the SD card.
Install Nachtzuster Birdnet as directed.
Keep installing, it will reboot when installation is complete.
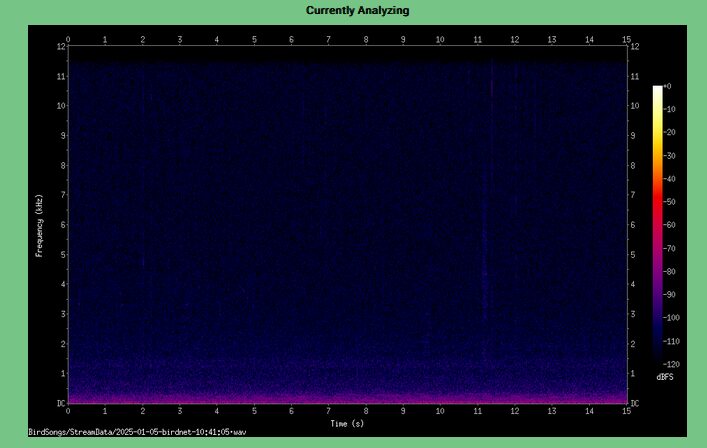
Check out your Birdnet installation to make sure it’s generally working. You should see some lines on the audio plots.
If Birdnet isn’t working, do not proceed. Birdnet will not install itself nicely on top of other software packages. You have to get this working first!
Assuming Birdnet is working, move on to Allsky installation with some modifications:
Git was installed with Birdnet so you don’t need to install it per the Allsky instructions, just jump into installing the Allsky software.
cd
git clone --recursive https://github.com/AllskyTeam/allsky.git
cd allsky
./install.sh
Answer questions (fresh install, camera connected, ram disk)
Error Code recorded:
Job for lighttpd.service failed because the control process exited with error code.

See "systemctl status lighttpd.service" and "journalctl -xeu lighttpd.service" for details.
Eventually it will ask for some location data, input it.
Couple more notices
Allow system to reboot after install
Pull up a command line on your RPi (SSH or local), username is admin, password secret
Configure Allsky Settings
Cd /etc/lighttpd/
Sudo vi lighttpd.conf
Update server.port=80 to server.port=81
This moves the Allsky server to port 81 when you’re using a web browser to access the system.
Birdnet will automatically continue running on port 80
Following these steps to install blinka first https://learn.adafruit.com/circuitpython-on-raspberrypi-linux/installing-circuitpython-on-raspberry-pi
The instructions assume you’re installing from a fresh OS with no extra software but because we’ve already installed two modern software packages we’ve got some stuff already setup. Namely PIP, Setuptools, and the python virtual environment (venv).
python3 -m venv env --system-site-packagessource env/bin/activateinstall via automated installer
Reboot
Reconnect to the RPi
This step may not be needed, I need to investigate further. Won’t hurt though if you do run it (I did).
python3 -m venv env –system-site-packageHere’s the important steps though. This sets up your project and environment for Blinka.
mkdir project-name && cd project-namepython3 -m venv .envsource .env/bin/activatepip3 install Adafruit-Blinkasudo nano blinkatest.py import board
import digitalio
import busio
print("Hello, blinka!")
# Try to create a Digital input
pin = digitalio.DigitalInOut(board.D4)
print("Digital IO ok!")
# Try to create an I2C device
i2c = busio.I2C(board.SCL, board.SDA)
print("I2C ok!")
# Try to create an SPI device
spi = busio.SPI(board.SCLK, board.MOSI, board.MISO)
print("SPI ok!")
print("done!")Exit out of nano (or whatever text editor you’re using). Then run it with:
python3 blinkatest.pyYou should get this:
(.env) adminaccount@NaturePi:~/power_monitor$ python3 blinkatest.pyHello, blinka!
Digital IO ok!
I2C ok!
SPI ok!
done!
That’s success right there!
Now we’ll install the actual code we need for the INA3221 board. Install the library required with this command:
pip3 install adafruit-circuitpython-ina3221Create a new file called powermonitor.py and open it in a text editor:
sudo nano powermonitor.pyHere’s the Adafruit code, again why make life hard when you can just use it?
# SPDX-FileCopyrightText: Copyright (c) 2024 Liz Clark for Adafruit Industries
#
# SPDX-License-Identifier: MIT
import time
import board
from adafruit_ina3221 import INA3221
i2c = board.I2C()
ina = INA3221(i2c)
while True:
    for i in range(3):
        bus_voltage = ina[i].bus_voltage
        shunt_voltage = ina[i].shunt_voltage
        current = ina[i].current_amps * 1000
        print(f"Channel {i + 1}:")
        print(f"  Bus Voltage: {bus_voltage:.6f} V")
        print(f"  Shunt Voltage: {shunt_voltage:.6f} V")
        print(f"  Current: {current:.6f} mA")
        print("-" * 30)
    time.sleep(2)
Should see power data, CTRL-x to break.
A year ago or so I came across this awesome article on how to build your very own all sky camera. For those who haven’t heard of these, basically imagine having a camera capturing the night sky, night after night, and compiling it all while you sleep in your warm bed.
I grabbed a Raspberry Pi 4 and an HQ camera, an electronic enclosure and an acrylic dome. Slapped it all together and followed the directions at the AllskyTeam Github. The system worked great.

But once I had it up and running, then what? I mean, all day it’s just sitting there, waiting for the sun to get out of the way so it can get more stunning photos.
So yet again, cruising through sites like Hackaday and I come across a project that catches my eye. I ended up on a more recently maintained fork of the original BirdNET-Pi, Nachtzuster’s BirdNET-Pi. After buying some supporting hardware, namely a USB Sound Card and a lapel microphone, I started playing with it on a Raspberry Pi 5. Up and running and it’s pretty damn cool. Except I’ve got it going on a box that can’t go anywhere uncovered outside.
Well I’ve got one box that has to out in the open and another that can’t go out that far. One runs all night and the other is doing most of it’s work during the day. Sounded like an opportunity to bring this all together in a single box.
Add on top of this is a desire to remotely place the box away from the house and not require AC power and I’ve got a bigger project to start working on. I also want to rebuild the enclosure to make it more resilient in the desert heat and freezing winters. Thus was born the concept of a NaturePi.
NaturePi Hardware
NaturePi Power
That’s how you do it right? First thing you program is something that says Hello World. So here it is. Hello World!
So what is this whole thing about? Well the best way to describe it is I needed some place to keep a record of what I did to make it work because when I go to fix it I won’t remember. Also, why not make it available for other’s to see how I did it and probably do it better?
That’s basically it! Let’s get going!